Installing fiber optic cables is a delicate process that requires careful planning and execution to ensure the integrity and performance of the network. Here's a comprehensive guide on how to install fiber optic cables:

Preparation
Survey the Installation Site
Conduct a thorough survey of the site where the fiber optic cables will be installed.
Identify potential obstacles, such as underground utilities, trees, and buildings.
Plan the cable route to minimize bends and avoid areas where the cable could be damaged.
Obtain Necessary Permits
Ensure you have the necessary permits and approvals from local authorities before starting the installation.
Gather Equipment and Materials
Assemble all necessary equipment and materials, including fiber optic cables, connectors, splice kits, pulling equipment, and testing tools.
Installation Steps
1. Trenching and Burying
If the cable is to be buried underground, dig a trench along the planned route.
Ensure the trench is deep enough to protect the cable from damage and meets local codes and standards.
Lay the cable in the trench and cover it with soil or other protective material.
2. Aerial Installation
For aerial installations, use poles, brackets, and other hardware to support the cable.
Ensure the cable is securely fastened and does not sag or come into contact with obstacles.
3. Pulling the Cable
Use pulling equipment to gently pull the fiber optic cable along the planned route.
Avoid sharp bends or excessive tension that could damage the cable.
Use lubricants if necessary to reduce friction and ease the pulling process.
4. Splicing and Termination
At points where the cable needs to be joined or connected to equipment, use splice kits or connectors to create a secure and reliable connection.
Follow manufacturer instructions for splicing and termination to ensure proper alignment and coupling of the fiber cores.
Use cleaning tools and alcohol wipes to keep the fiber ends clean and free of contamination.
5. Testing and Troubleshooting
After installation, use testing tools such as an optical power meter and light source to test the performance of the fiber optic cable.
Check for insertion loss, reflections, and other anomalies that could indicate damage or improper installation.
Troubleshoot any issues by tracing the cable and checking for bends, kinks, or damage.
Post-Installation
A. Documentation
Keep detailed records of the installation process, including cable specifications, route maps, and test results.
This information will be useful for future maintenance and troubleshooting.
B. Training
Ensure that personnel responsible for maintaining the fiber optic network are trained in proper handling, installation, and troubleshooting techniques.
C. Regular Maintenance
Schedule regular maintenance checks to ensure the integrity and performance of the fiber optic cable.
Inspect the cable for signs of wear, damage, or degradation, and repair or replace as necessary.
Safety Considerations
Wear appropriate protective gear, such as gloves, safety glasses, and hearing protection, during installation.
Follow safety guidelines and procedures to avoid accidents and injuries.
Ensure that all equipment and tools are in good working condition and properly maintained.
By following these steps and considering safety and performance requirements, you can ensure a successful installation of
fiber optic cables.


 ADSS Fiber Optic Cable
 OPGW Optical Ground Wire
 Bare Conductor
 Communication Optical Fibre
 Aerial Fiber Cable
 Duct Fiber Cable
 Direct Buried Fiber Cable
 FTTH Drop Cable
 Air Blown Micro Cable
 Armored Fiber Optic Cable
 High Density Ribbon cable
 Biologically Protective Cable
 FTTX Tactical Cable
 Indoor Fiber Optic Cable
 Hybrid Fiber Optic Cable
 Fiber Optic Assemblies
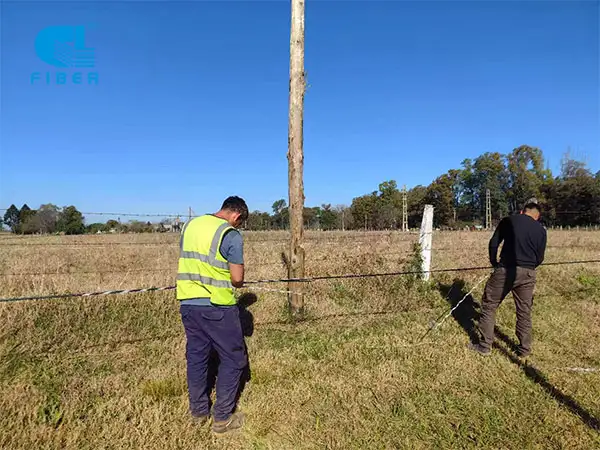

 Company Profile
 Development History
 Qualification Honor
 Company Videos
 Exhibiting Overseas
 Our Solution